Welcome to my brand new blog for all things craftabulous! I've received some requests for a blog, so here it is in all it's glory. I'd like it to be both fun and useful for my friends and customers, and since Christmas is coming I thought I'd do a tutorial on the ribbon wreaths I've been making. They make sweet Christmas cards or tags or a nice embellishment for a scrapbook layout. I THINK I made these up. I don't remember getting the idea from anyone else.I actually dreamed about this idea, woke up and scribbled it into the notebook on my night stand and then went back to sleep. Bear with me, I haven't figured out how to rotate pictures in here so the cards are sideways. And so without further ado....The Ribbon Wreath.
 |
| Here is a completed example using different ribbon. I think this is my favourite one so far! |
 |
| 1) Cut out a shape of your choice. In the card at the top I used a square to go with the style of card I was making. For this one I cut out an oval using my Cuttlebug and one of the Standard large oval Nestabilities. |
 |
| 2) LIGHTLY trace the top of a CTMH embellishment tube or other small circle. Lightly mark the 1/4 and 1/8 points around the circle. |
 |
3) Cut a 13 1/2" length of 1/4" wide ribbon.
4) Place (9) glue dots on the TOP SIDE of your ribbon (if it's not double sided), one at the very end and every 1 1/2" after that (mini glue dots would be best but I only had the regular size so I folded them to fit), this will leave a short tail at the end to work with. If you use a much wider ribbon you will need to adjust the size of your circle and how far apart you put your glue dots. |
 |
| 5) Place the first dot on the 1/8th mark at the bottom of the circle, pointing outward at an angle. |
 |
| 6) Loop the ribbon around and stick the next dot on the next 1/8th mark. Keep going around clockwise. |
 |
| The last dot will go over top of the first end. |
 |
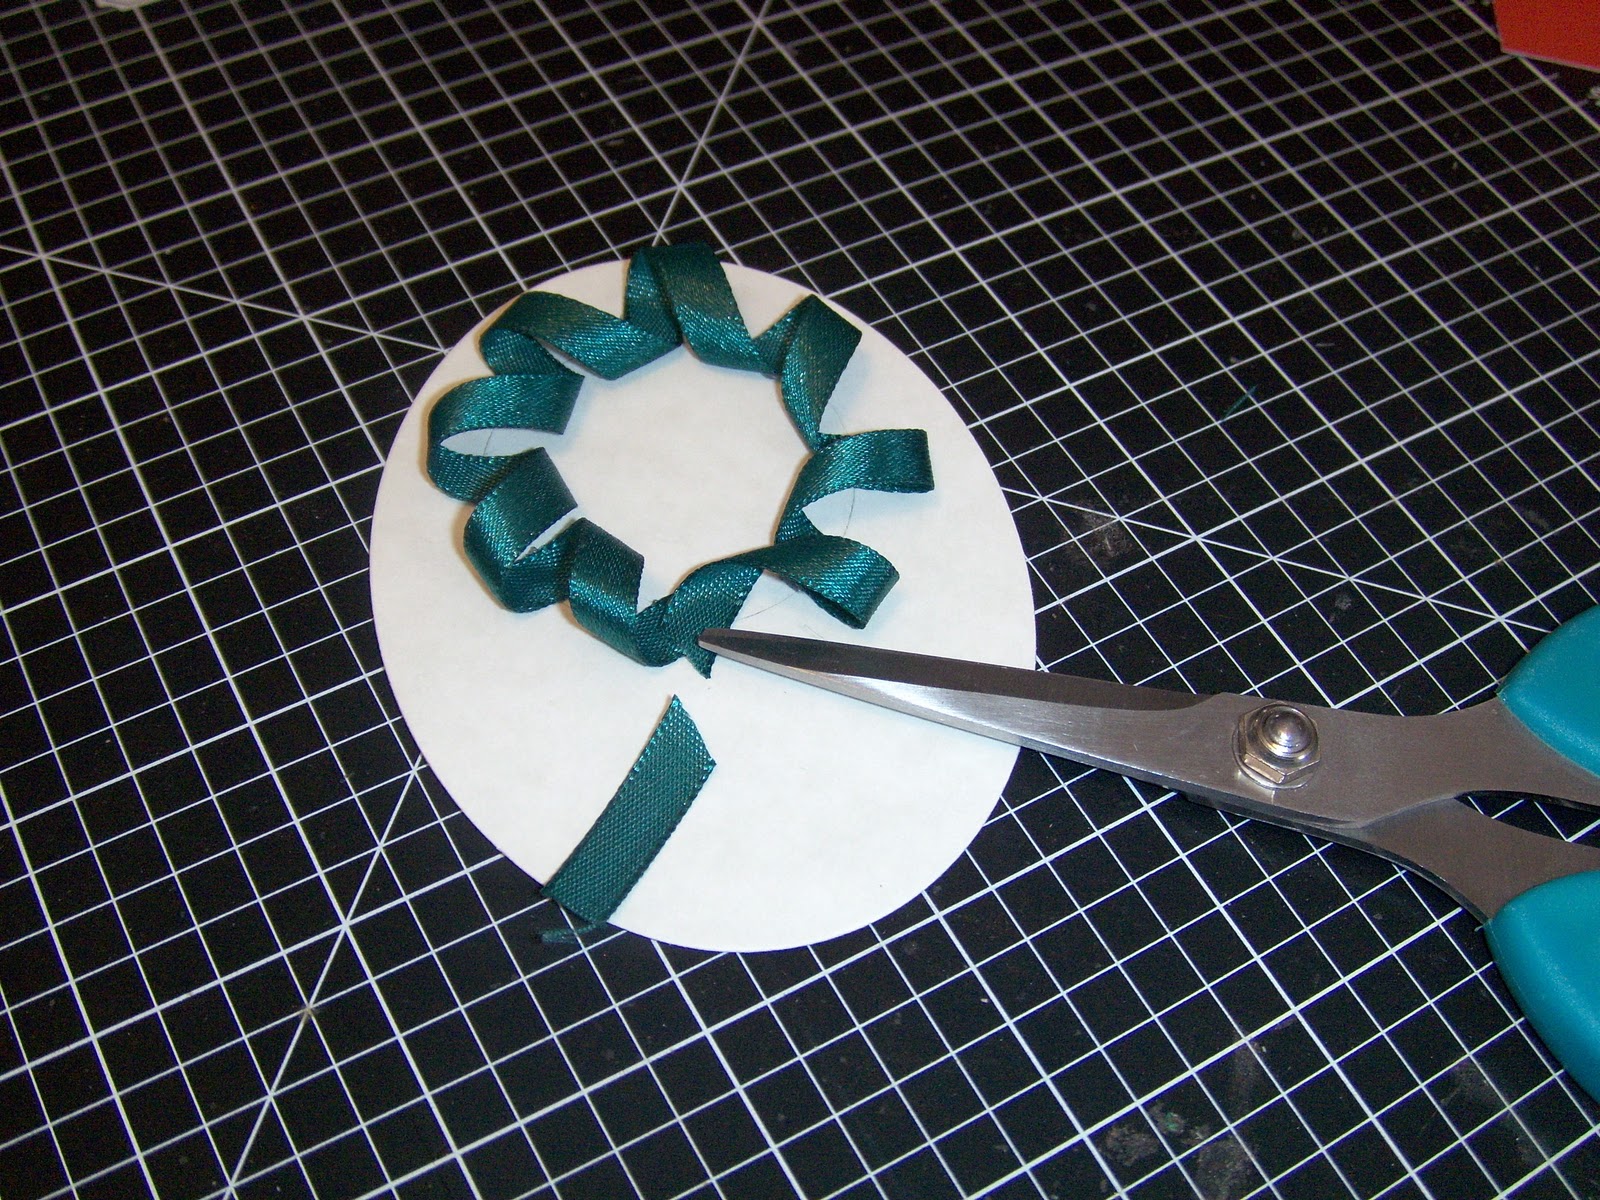
| Trim the tail close to the lst dot. |
 |
| 7) Tie a red bow and stick it over the cut ends at the bottom. Sponge the edges of the oval and stamp a sentiment as desired. |
 |
| 9) Attach to a card design of your choice. For this one I used a pattern found on page 72 of the Wishes card confidence program book, available for purchase on my Close To My Heart website. |
That's it for now. Have a creative Day!


Very clever! TFS! I can't wait to try this--and tell my mom about your tutorial. She's really into ribbons and bows right now. :-)
ReplyDeleteWhat a great ribbon idea! And your blog is looking good, too :o)
ReplyDeleteThis is such a darling wreath. Very nice tutorial!!
ReplyDeleteVery very cool great job on your first post!!!
ReplyDelete